Time: under an hour, and most of that is deciding where your files live. Cost: nothing on top of a Pi and a disk you already own. Difficulty: the easiest build in this series to get working, and the easiest to quietly ruin with one dropdown.
At the end of this you will have your own films, home video, music and photographs available in a browser and on a television, served from a Raspberry Pi on your own network, with no subscription and nothing leaving your house.
You will also know the single most useful thing about running one, which almost no tutorial tells you: a Pi is an excellent media server and a hopeless media transcoder, and the difference between those two jobs is a factor of a hundred.
Every number below was measured on 12 September 2026 on a Raspberry Pi 5 Model B Rev 1.1 running Jellyfin 10.11.11, on a machine that was simultaneously serving thirty-odd websites. I built this install from scratch that morning specifically so that nothing here is quoted from memory.
Before you start
What you need to buy: nothing. Jellyfin is free and there is no account to create, no key, and nobody to tell.
What you need to have already: a Raspberry Pi 4 or 5 with Debian, network access and SSH. Somewhere to keep the files — a USB disk plugged into the Pi is the normal answer and the one I would recommend. And something to watch on: a browser on the same network is enough to start.
What you need to decide before you begin, and it is the only real decision here: are your files in a format your televisions can already play? If yes, this build will run beautifully on hardware that cost you a few pounds a month in electricity. If no — if you have a pile of old films in formats your devices cannot handle — then the Pi has to convert them as they play, and it cannot. Not slowly. It cannot keep up with real time at all, and I measured that below.
That decision shapes everything, so make it first rather than discovering it halfway through a film.
The build
Six steps.
1. Install it
Jellyfin publish their own repository. Their one-line installer pipes a script from the internet straight into a root shell; you do not have to let it. This is the same thing in steps you can read:
sudo apt install curl gnupg
sudo mkdir -p /etc/apt/keyrings
curl -fsSL https://repo.jellyfin.org/jellyfin_team.gpg.key \
  | sudo gpg --dearmor -o /etc/apt/keyrings/jellyfin.gpg
Then the repository line, scoped to that key so a compromise of Jellyfin's signing key cannot be used to sign packages pretending to be Debian's:
. /etc/os-release
echo "deb [signed-by=/etc/apt/keyrings/jellyfin.gpg] https://repo.jellyfin.org/debian ${VERSION_CODENAME} main" \
  | sudo tee /etc/apt/sources.list.d/jellyfin.list

sudo apt update
sudo apt install jellyfin
What you should see: three packages, not one — the server, the web interface, and Jellyfin's own build of ffmpeg. That third one matters later.
dpkg -l | grep jellyfin
Mine reports jellyfin-server 10.11.11+deb12 on arm64.
2. Start it, and read the page it gives you
sudo systemctl enable --now jellyfin
The --now starts it; enable is what makes it come back after a power cut. Both halves matter.
What you should see: a response on port 8096 within a few seconds. Mine answered in three:
curl -s http://localhost:8096/System/Info/Public
{"serverName":"raspberrypi","version":"10.11.11",
 "productName":"Jellyfin Server","startupWizardCompleted":false}
startupWizardCompleted: false is what you want to see on a first run.
Now open http://<your-pi>:8096 in a browser while it is still starting, because Jellyfin does something unusually decent here and you only get to see it once. Instead of a blank page or a connection error, it serves a live startup report — every database migration as it is applied, each with a tick, and a storage check that tells you what it found:
Storage path `/var/lib/jellyfin` (Fixed) successfully checked with
51.4GiB free which is over the minimum of 2GiB.
I mention it because it is the opposite of everything else in this guide. That is a piece of software telling you what it is doing, in order, while it does it, and naming the threshold it checked against rather than just saying "OK". If more things did that I would have less to write about.
3. Run the setup wizard
In the browser: language, then an administrator username and password, then remote access.
Turn remote access off. It is on by default and it will offer to configure your router for you. Unless you have specifically decided to expose a media server to the internet and are prepared to maintain that decision, say no. Everything in this guide works fine on your own network.
If you would rather not click through a wizard — and if you are rebuilding this a second time you will not — the whole thing is four unauthenticated API calls, which is how I built the install I measured for this guide:
B=http://localhost:8096
J='Content-Type: application/json'

curl -s -X POST "$B/Startup/Configuration" -H "$J" \
  -d '{"UICulture":"en-GB","MetadataCountryCode":"GB","PreferredMetadataLanguage":"en"}'

curl -s "$B/Startup/User"                 # <-- NOT optional. See below.

curl -s -X POST "$B/Startup/User" -H "$J" \
  -d '{"Name":"admin","Password":"'"$(cat ~/.jf-pw)"'"}'

curl -s -X POST "$B/Startup/RemoteAccess" -H "$J" \
  -d '{"EnableRemoteAccess":false,"EnableAutomaticPortMapping":false}'

curl -s -X POST "$B/Startup/Complete" -H "$J"
The four POSTs each return 204. Note the password coming out of a file rather than being typed on the command line — anything you type as an argument is visible in the process list to every other user on the box, and it lands in your shell history besides. Generate it into a file with 600 permissions and read it from there.
That bare GET /Startup/User is the ordering quirk, and it cost me three attempts. Skip it and the POST immediately after returns 404 instead of creating your administrator — no error text, no explanation, just a missing endpoint where a working one sat a moment later. Do the GET first and it works every time.
Also worth knowing before you script this: the server answers /System/Info/Public within a couple of seconds but the /Startup/ endpoints return 503 for a while after that, because database migrations are still running. Poll GET /Startup/Configuration until it returns 200 rather than waiting a fixed number of seconds. I wrote a readiness check that tested for the presence of a field name rather than the response code, which was true immediately, so my script sailed past the gate and got five 503s in a row.
And those endpoints stop working the moment /Startup/Complete returns, which is the correct design and also worth knowing: an unfinished Jellyfin on your network is an open door, so do not leave one half-configured overnight.
4. Put your files where Jellyfin can actually read them
This is the step that produces the most confused forum posts, and it is entirely about permissions.
Jellyfin runs as its own user — jellyfin — not as you. It needs to be able to traverse every directory in the path and read the files at the end of it. A folder in your home directory will usually fail on the first count.
sudo mkdir -p /srv/media/Videos
sudo chown -R youruser:youruser /srv/media
chmod -R a+rX /srv/media
What you should see — and this is the diagnostic to run before you add a library rather than after it fails:
namei -l /srv/media/Videos/somefile.mp4
drwxr-xr-x root     root     /
drwxr-xr-x root     root     srv
drwxr-xr-x youruser youruser media
drwxr-xr-x youruser youruser Videos
-rw-r--r-- youruser youruser somefile.mp4
namei -l walks the whole path and prints the permissions at every level. If any line in that output lacks x for other, Jellyfin cannot get past it, and the error you will eventually see says nothing about permissions.
5. Add a library and scan it
In the browser this is Dashboard → Libraries → Add Media Library. Pick the content type honestly: Movies and Shows turn on fetching artwork and metadata from the internet, which is wonderful for commercial films and actively unhelpful for your own footage. For home video, choose Home videos and photos and Jellyfin will leave your filenames alone.
By API, for the record, it is one call:
curl -s -X POST "$B/Library/VirtualFolders?name=Videos&collectionType=homevideos&refreshLibrary=true" \
  -H 'Content-Type: application/json' -H "$AUTH" \
  -d '{"LibraryOptions":{"PathInfos":[{"Path":"/srv/media/Videos"}],"EnableRealtimeMonitor":true}}'
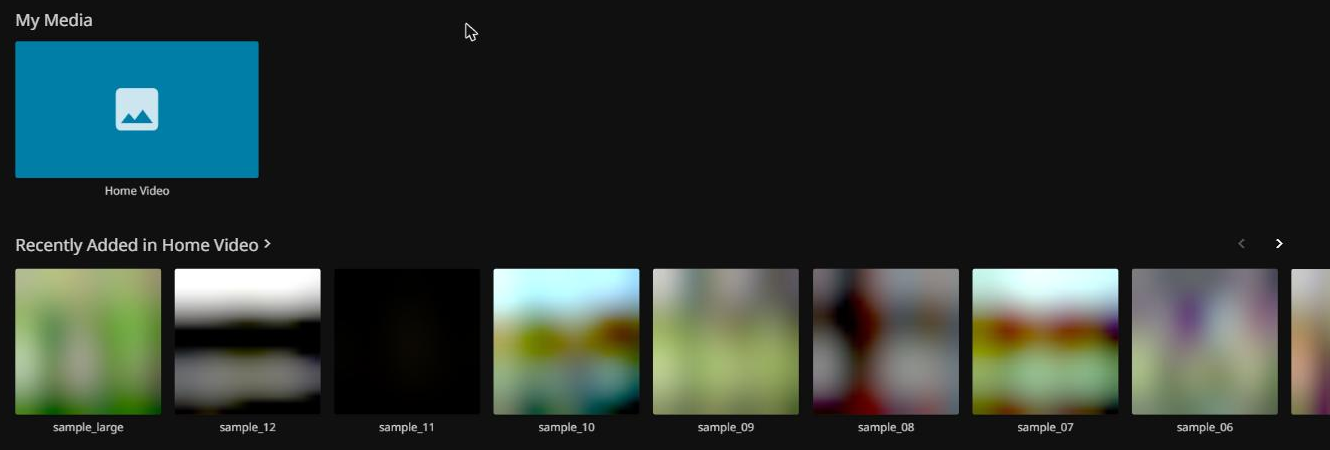
What you should see: your files, within seconds. Mine — thirteen video files, 4.2GB, on a local disk:
scan settled after 7s
Video items: 13
library: Videos -> ['/srv/media/Videos']
Thirteen files in, thirteen items out, seven seconds.
Check the count rather than the message. A scan that finds nothing reports success just as cheerfully as one that finds everything, and the next section is what happens when you stop checking.
6. Leave hardware acceleration alone
There is a dropdown in Dashboard → Playback → Transcoding labelled "Hardware acceleration". On a fresh install it is set to none, which is correct.
Leave it there. Setting it is the single most expensive mistake available in this build, and the whole of the next section is about why.
The five ways it lied to me
Everything above works. What follows is what I found when I stopped trusting it, and — as with everything else in this series — not one of these five produced an error message.
1. The dropdown offers hardware this machine does not have
Symptom: you select a hardware acceleration option because it sounds like the right one for a Pi, save it, and nothing gets faster. No error, no warning, no entry in any log that Jellyfin shows you.
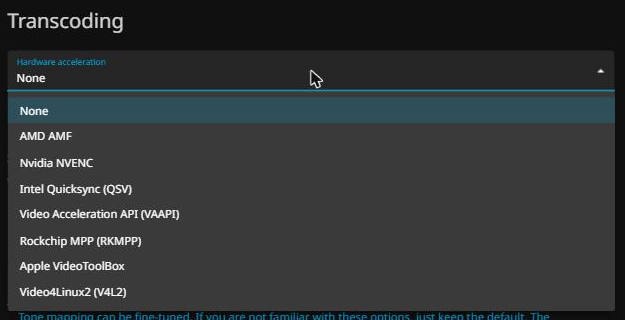
Video4Linux2 is the one that looks right for a Pi, which is exactly why it is the one people pick — it is the Linux interface to the Pi's own video hardware, and on a Pi 5 there is nothing behind it. The dropdown is not lying to you. It simply is not asking your machine.Cause, in three measured parts. The install I inherited on this machine had been set to v4l2m2m — the obvious choice from that list. Here is what happens when you actually ask that decoder to do something:
$ /usr/lib/jellyfin-ffmpeg/ffmpeg -c:v h264_v4l2m2m -i sample.mp4 -f null -
[h264_v4l2m2m] Could not find a valid device
[h264_v4l2m2m] can't configure decoder
Error while opening decoder: Invalid argument
There is no device. The Pi 5 does not have the H.264 hardware decoder its predecessor had, so the interface exists and there is nothing behind it.
Second, ask Jellyfin's bundled ffmpeg what acceleration it was actually built to do:
$ /usr/lib/jellyfin-ffmpeg/ffmpeg -hwaccels
cuda
drm
opencl
rkmpp
Four methods, and on this machine every one of them is unavailable. cuda wants an Nvidia card. rkmpp wants a Rockchip processor. And v4l2m2m — the one that was selected — is not even in the list.
Third, and this is my favourite thing I found all day. Read the service log at startup:
mpp_platform: can not found match soc name: raspberrypi,5-model-b brcm,bcm2712
mpp_platform: can not found match soc name: raspberrypi,5-model-b brcm,bcm2712
mpp_platform: can not found match soc name: raspberrypi,5-model-b brcm,bcm2712
... 23 times, from 23 separate processes
That is Rockchip's media library, shipped inside the ARM build, looking for a Rockchip chip and finding a Broadcom one. Twenty-three failed hardware probes on a single startup. And in the same window:
jellyfin ERR/FTL lines: 0
Twenty-three failures, zero errors. Every one of them is logged at information level by a library nobody reads, while the application above it reports a clean start.
Fix: set hardware acceleration to none and stop thinking about it. Then, if you ever do change it, verify it with the one-line ffmpeg command above rather than with the settings page — because the settings page will show your selection saved either way. A dropdown that accepts a value is not a dropdown that achieved anything.
2. A library of 19,935 items, of which three existed
This is the one that made me write this guide, and it is the plainest example of a green light I have.
Symptom: Jellyfin starts. The service reports active. The log is clean. The library is browsable. And it is almost entirely fictional.
The install I found on this machine was pointed at five directories that no longer existed. The catalogue did not care. I counted it:
items with a path recorded : 19935
path exists on disk        :     3
path DOES NOT exist        : 19192
Nineteen thousand nine hundred and thirty-five catalogued items. Three of them were real. Eight thousand of the phantoms were photographs. And all of it sat in a 47MB database that Jellyfin loaded without complaint, serving a browsable, searchable, thumbnail-adorned library of things that were not there.
Cause: a media library is a cache, and nothing in the design treats a missing file as an error. Which is defensible — a disk that is briefly unplugged should not wipe your watch history. But the consequence is that "my library looks fine" and "my library is fine" are different statements, and only one of them is cheap to check.
And the reason those files were gone is the best part, because nothing went wrong. My first assumption was that something had broken or been lost. It had not. Those five directories were a second copy of a file store that also lived on the network drive; the copy was checked against the original, found to be genuinely redundant, and deleted on purpose to reclaim 802GB. That was a correct decision, correctly executed, and nothing was lost.
It also invalidated 19,935 catalogue entries, because no part of "delete a redundant copy" involves telling a media server that half its library just became fiction. Nobody made a mistake and the result is indistinguishable from the version where somebody did. That is the shape of most of these failures once you look properly: not an error, but a correct action in one system that silently falsified the state of another.
And here is how it was actually found, which is the part that should worry you
Not by me. Not by opening the media server and noticing anything wrong with it. It was spotted by the person who looks after the disks, while looking at something else entirely — disk capacities.
Sit with that for a second, because every element of it is instructive.
The system that was broken never mentioned it. The person who uses that system every week — me — never noticed, because there was nothing to notice: the library opened, it listed things, the thumbnails were there. And the fault surfaced on a completely unrelated axis, in a conversation about free space, as a side effect of somebody being curious about a number in a different tool.
Which means the discovery was incidental, and incidental discoveries are not a strategy. Nothing about that conversation had to happen. Take it away and the library sits there for another year, browsable and empty, and I would still be describing it as working — because from where I was standing, it was.
There is a nice symmetry to it as well: the deletion that created the phantom library was a disk-space decision, and a disk-space conversation is what eventually revealed it. The only axis that noticed was the same axis that broke it. The media server itself contributed nothing to its own diagnosis at any point.
So when I say the check has to be yours, this is why. There is no error message available for this class of fault, and the alternative to a deliberate check is hoping somebody trips over it while looking at a graph of something else.
Fix: the check is in the next section and takes one second. Run it after you ever move, rename or re-mount anything.
3. The health check that asked the wrong question
Symptom: systemctl is-active jellyfin returns inactive. systemctl is-enabled jellyfin returns not-found. Jellyfin has been serving perfectly for forty-two hours.
Both answers are correct. Systemd genuinely does not manage that Jellyfin, because it is running as a container — and a container is invisible to the service manager by design. So the canonical "is it running?" command returns a confident, unambiguous, completely misleading answer.
I include it because of how I found it. I went to write this guide, ran the obvious check on the machine my own notes named, got inactive, and concluded the service was simply stopped. It was not stopped. It had moved. I then spent twenty minutes inspecting a complete, plausible, entirely dead installation before anybody mentioned the move — and the artefact that misled me was the one that most resembled documentation.
Fix: ask the application, not the supervisor. curl the API. A process that answers on its port is running, whatever started it; a supervisor that says inactive has told you about the supervisor.
4. The service that failed before it started, and blamed the restart
Self-inflicted, and instructive because of the error message.
While rebuilding, I moved /var/lib/jellyfin aside to get a clean install. Jellyfin then refused to start, and what the log showed first was this:
jellyfin.service: Start request repeated too quickly.
jellyfin.service: Failed with result 'exit-code'.
Failed to start jellyfin.service - Jellyfin Media Server.
Which is about restart rate limiting and is not the problem at all. The actual cause is six lines earlier:
jellyfin.service: Changing to the requested working directory failed:
  No such file or directory
jellyfin.service: Failed at step CHDIR spawning /usr/bin/jellyfin
Main process exited, code=exited, status=200/CHDIR
The unit declares WorkingDirectory=/var/lib/jellyfin, so systemd cannot even enter the directory to launch the binary. It fails, retries, fails, and after five attempts the rate limiter speaks — and the rate limiter's message is the one at the bottom of the log where everybody looks.
Fix: recreate the directory with the ownership the package expects (jellyfin:adm, mode 750, on mine), then systemctl reset-failed jellyfin before starting, or the limiter will refuse a perfectly good attempt. And read up, not down. The last error in a log is usually the consequence; the first one is usually the cause.
5. The check I wrote wrong, which returned a beautiful zero
The last one is mine and it is the one I would most like you to learn from, because I very nearly published it as a finding.
Having found those twenty-three hardware probes, I wrote a command to count them properly. It returned:
mpp_platform lines : 0
distinct processes : 0
Which I could have read as "good news, it has stopped doing that". The real explanation is that I had quoted the command wrong, the date argument arrived mangled, the tool errored to a stream I was not reading, and my counting pipeline dutifully counted the nothing that came out. A broken measurement and a clean result are the same shape.
The tell was that another part of the same command printed a shell syntax error. Had it not, I would have had a plausible zero and no reason to doubt it. Re-run with the quoting fixed and the number is 23.
So: when a check returns zero, make it prove it can return something else. Run it against a case you know is broken. A test that has never once failed is not a test, it is a decoration.
The check that catches all five
Five commands. None takes more than a second. Run them after the build, and again after you ever move, rename or re-mount your media — which is the only thing that reliably breaks this.
1. Is it actually running?
curl -s -o /dev/null -w '%{http_code}\n' http://localhost:8096/System/Info/Public
Expect 200. Ask the application, not the service manager — see failure 3. If you want the service manager's opinion as well, fine, but it is the second question, not the first.
2. Does the library actually exist? This is the important one.
sudo python3 - <<'PY'
import sqlite3, os
db = sqlite3.connect('file:/var/lib/jellyfin/data/jellyfin.db?mode=ro', uri=True)
rows = [r[0] for r in db.execute(
    "SELECT Path FROM BaseItems WHERE Path IS NOT NULL AND Path != ''")]
missing = [p for p in rows if p.startswith('/') and not os.path.exists(p)]
print(f"catalogued: {len(rows)}   missing from disk: {len(missing)}")
for p in missing[:5]:
    print("  gone:", p)
PY
Expect missing from disk: 0, or a small number if a drive is genuinely unplugged. If the number is in the thousands you are browsing a catalogue, not a library.
And because failure 5 above was me publishing a zero I had not earned, here is this check run against both installs on the same machine within the same hour:
FRESH INSTALL -> catalogued:    18   missing from disk:     0
OLD INSTALL   -> catalogued: 19935   missing from disk: 19192
That is the check doing both jobs: staying quiet on a healthy library and screaming on a dead one. A zero from a check you have seen return a non-zero is worth something. A zero from a check you have only ever seen return zero is worth nothing at all — and the two look identical on the screen.
The database sizes are the other tell, incidentally: 464KB for eighteen real items against 47MB for twenty thousand imaginary ones. Nothing warns you that the big number is the sick one.
3. Is hardware acceleration real, or just selected?
grep -E 'HardwareAccelerationType|EnableHardwareEncoding' /etc/jellyfin/encoding.xml
/usr/lib/jellyfin-ffmpeg/ffmpeg -hide_banner -hwaccels
Expect the configured type to appear in the -hwaccels list. If it does not, it is doing nothing. Mine said v4l2m2m against a list of cuda / drm / opencl / rkmpp, which is a mismatch you can spot in a second and which no part of the interface will ever mention.
Worth knowing: EnableHardwareEncoding can read true while the acceleration type is none. The two settings are independent and the combination is meaningless. Do not take the true as evidence of anything.
4. Can this machine transcode at all?
Run it once, on your own hardware, before you rely on the answer. Time a re-encode against a straight copy of the same file:
FF=/usr/lib/jellyfin-ffmpeg/ffmpeg
SRC=/srv/media/Videos/somefile.mp4

time $FF -loglevel error -i "$SRC" -vf scale=1920:1080 \
     -c:v libx264 -preset veryfast -crf 23 -an -f null -

time $FF -loglevel error -i "$SRC" -c copy -f null -
On my Pi 5, for the same 5.8-second 720p clip on four cores:
- Re-encoding to 1080p: 0.91× realtime. Slower than watching it.
- Copying the stream: 91× realtime.
A hundredfold difference, same machine, same file. And note which side of one the transcode lands on: below it.
That was a low-bitrate 720p source, which is the kindest case. I ran it again from a 24 Mbps 1080p file — the sort of thing a camera or a Blu-ray rip actually produces — and it got worse:
| Re-encode to | Speed |
|---|---|
| 1080p | 0.37× realtime |
| 720p | 0.50× |
| 480p | 1.02× |
| stream copy | 76× |
So the honest range for re-encoding 1080p on a Pi 5 is somewhere between a third and nine tenths of realtime, depending on how demanding the source is — and it is never above one. A single transcoded stream will stutter and there is no configuration that fixes it, because the machine is being asked to do arithmetic it cannot finish in time.
Which is not the same as saying the Pi cannot convert video. It can, and there is a whole section below on doing exactly that. The problem is never the work. The problem is the deadline.
This is the number that should shape your whole build. Make your files playable and the Pi has nothing to do but read from a disk and put bytes on a network, which is a job it is extremely good at. Make the Pi convert them and you have bought the wrong computer for the task.
5. Is anything transcoding right now?
curl -s "http://localhost:8096/Sessions" -H "Authorization: MediaBrowser Token=\"$TOKEN\"" \
  | python3 -c 'import json,sys
for s in json.load(sys.stdin):
    p = s.get("PlayState",{}) ; n = s.get("NowPlayingItem")
    if n: print(s.get("DeviceName"), "|", n.get("Name"), "|",
                "TRANSCODING" if p.get("PlayMethod")=="Transcode" else p.get("PlayMethod"))'
Play something on each of your devices in turn and watch what this says. DirectPlay is free. Transcode means that device has just asked your Pi to do the one thing it cannot, and the fix is nearly always a setting on the client rather than on the server.
Note what all five have in common: every one asks the system what is true, and not one asks whether the configuration looks right. All five failures above had correct-looking configuration.
Converting your old stuff so it never has to transcode
Everything above says the same thing: do not make the Pi convert anything while you are watching it. Which raises the obvious question — what do you do about the pile of old files that do need converting?
You convert them once, in advance, and then never again. This section is how.
First: find out whether you need to convert at all
Do this before anything else, because most "incompatible" files are not. A video file is two things — the streams inside it, and the container wrapping them. Devices refuse files for either reason, and only one of those is expensive to fix.
/usr/lib/jellyfin-ffmpeg/ffprobe -v error \
  -show_entries stream=codec_type,codec_name,width,height,bit_rate \
  -show_entries format=format_name,duration \
  -of default=nw=1 yourfile.mkv
What you are looking for is h264 video and aac audio. If you have those, the streams are fine and only the wrapper is wrong — and re-wrapping does not re-encode anything:
ffmpeg -i input.mkv -c copy -movflags +faststart output.mp4
Measured on my Pi: 76× realtime. A two-hour film re-wraps in about a minute and a half, and the video is bit-for-bit the same file inside a different box.
Compare that with the same file genuinely re-encoded, below, and the gap is roughly two hundredfold. So the single most valuable minute you will spend on your library is running ffprobe over it to find out which pile each file is in. Most people convert everything, and most people did not need to.
Second: know what it costs before you start the batch
If a file genuinely does need re-encoding, here is what that costs on a Pi 5 — measured, from a 24 Mbps 1080p source, four cores, -preset veryfast:
| Output | Speed | A two-hour film takes |
|---|---|---|
| 1080p | 0.37× realtime | 5.4 hours |
| 720p | 0.50× realtime | 4.0 hours |
| 480p | 1.02× realtime | 2.0 hours |
| stream copy (no re-encode) | 76× realtime | 1.6 minutes |
Two things fall straight out of that table.
The Pi can absolutely do this job. It just cannot do it live. Nothing about 5.4 hours is a problem for a batch that runs overnight — a batch job does not have to keep up with anything, which is the entire difference between converting and transcoding. The same 0.37× that makes on-the-fly playback impossible makes an unattended overnight run completely unremarkable. Transcoding fails because it has a deadline. Converting has no deadline.
And note where the crossover sits: 480p. That is the only resolution at which this machine keeps pace with realtime at all, and only just. If you ever wondered what a Pi could genuinely transcode on the fly, that is the answer, and it is not a resolution anybody wants.
The target format
There is one combination that plays on essentially everything — old televisions, phones, browsers, games consoles, a Chromecast:
- Video: H.264, High profile, level 4.1. Not H.265/HEVC — it is a better codec and far less universally supported, which is the opposite of what you want here.
- Audio: AAC, stereo. This is the one people get wrong. A 5.1 surround track is exactly what triggers a transcode on a device with two speakers, and the transcode you were trying to avoid happens for the audio rather than the video.
- Container: MP4, with the index moved to the front.
ffmpeg -i input.avi \
  -c:v libx264 -profile:v high -level 4.1 -preset veryfast -crf 20 \
  -c:a aac -b:a 192k -ac 2 \
  -movflags +faststart \
  output.mp4
Three flags worth understanding rather than copying:
-crf 20 is quality, not size — lower is better and bigger, and 18–23 is the useful range. You do not specify a bitrate; you specify how much quality loss you will tolerate and let it use whatever bitrate that needs. On a 51-second test file of mine the conversion came out smaller than the original and visually indistinguishable.
-preset veryfast is the speed/efficiency dial. Slower presets give you a smaller file for the same quality and take considerably longer. On a Pi, where the whole exercise is already measured in hours, veryfast is the right trade — and every number in the table above was measured with it, so a slower preset makes those hours longer.
-movflags +faststart moves the index to the beginning of the file. Without it a browser has to download the whole thing before it can start playing. It costs nothing and it is the difference between "plays instantly" and "seems broken".
The batch, and the rule that stops it hurting
Convert to a separate directory, never over the originals:
mkdir -p /srv/media/converted
for f in /srv/media/needs-converting/*.{avi,wmv,mkv,mpg}; do
  [ -e "$f" ] || continue
  out="/srv/media/converted/$(basename "${f%.*}").mp4"
  [ -e "$out" ] && { echo "skip $(basename "$f")"; continue; }
  echo "=== $(basename "$f")"
  nice -n 19 ffmpeg -nostdin -hide_banner -loglevel error -i "$f" \
    -c:v libx264 -profile:v high -level 4.1 -preset veryfast -crf 20 \
    -c:a aac -b:a 192k -ac 2 -movflags +faststart "$out"
done
Four details in there that are not decoration:
nice -n 19 — if this is the machine that also serves your media, or your websites, put the batch at the bottom of the priority list. It will take no longer in practice and it stops a five-hour job making everything else unpleasant.
-nostdin — without it, ffmpeg reads from the terminal and will silently swallow the rest of your loop. This is the single most common way a batch like this mysteriously converts one file and stops.
The [ -e "$out" ] && continue line makes the whole thing resumable. Run it again after a reboot and it picks up where it left off, which matters when the job is measured in nights.
And -loglevel error so that the output you see is only the things that went wrong. Run it under nohup or tmux; do not run a five-hour job over a connection that will drop.
Where to actually run it
Run the batch on the fastest machine in the house, not on the Pi — and then move the finished files to the Pi to be served. Any desktop with a graphics card will do this an order of magnitude faster, and if it has an Nvidia card you can hand the encode to it with -c:v h264_nvenc and watch a five-hour job become minutes.
But if the Pi is the only machine you have, it still works. It just works overnight. That is a scheduling problem, not a capability problem, and it is worth being clear about the difference because the internet will tell you a Pi "can't handle video". It can. It cannot handle video on a deadline.
Then check it, because this is a guide about things that lie
ffmpeg exiting cleanly means it wrote a file, not that the file is right. Two checks, both instant:
# 1. Did the whole thing convert, or did it stop early?
for f in /srv/media/converted/*.mp4; do
  printf '%-50s %s\n' "$(basename "$f")" \
    "$(ffprobe -v error -show_entries format=duration -of csv=p=0 "$f")"
done

# 2. Is it the format you actually asked for?
ffprobe -v error -show_entries stream=codec_name,channels \
  -of default=nw=1 /srv/media/converted/somefile.mp4
Compare the durations against the originals. A truncated conversion is the failure mode here and it does not announce itself — you get a perfectly valid MP4 that happens to stop forty minutes into a film, and you will discover it forty minutes into the film. Check the numbers, not the exit code.
Then play one converted file on each of your devices and run check 5 from the previous section. If it still says Transcode, the format is not the problem and a setting on the client is.
Keep the originals until you have done that, on something you do not mind filling up. Delete them a month later when nothing has complained.
What it costs
Measured on the Pi 5 described at the top, which was also serving thirty-odd websites throughout.
- 238 MB of memory at rest, and it does not grow. 335MB during a library scan.
- Processor: effectively nothing. 13.6% of one core immediately after starting, decaying to 3.9% within ninety seconds and 1.9% at rest. System load barely moved.
- Three seconds from service start to answering on its port.
- Seven seconds to scan thirteen files, 4.2GB, from local disk.
- 0 MB of network egress. Nothing leaves the house.
That is the entire running cost of your own media service. The electricity is the expensive part, and it is a Pi.
What I would build first
- Install it and run the wizard. Remote access off.
- One library, one folder, five files. Prove the scan finds them before you point it at a terabyte.
- Run check 4 — the transcode test — on your own hardware. Do this before you put anything else in. The answer determines whether this build is brilliant or doomed, and it takes a minute.
- Then the rest of your media, in libraries by type.
- Then check 2, and put it somewhere you will run it again. Not because it will fail today — because the day your disk gets re-mounted somewhere else, nothing will tell you.
- Only then touch playback settings, if ever. On a Pi the correct value is the default.
Getting an assistant to do this for you
Three things worth knowing if you would rather hand this to Claude.
Give it the constraint, not the task. "Set up Jellyfin on the Pi, the media is on a USB disk at this path, and I need to know before we start whether this machine can transcode 1080p" is a far better brief than "install Jellyfin". The second gets you a working install with the transcoding question unanswered, which is the one that matters.
Ask it to count, not to confirm. Every failure in this guide survives the question "is it working?" and dies instantly to "how many items are in the library, and how many of those files exist?". An assistant will answer either question happily; only one of them can catch a library that is 99.98% fiction.
And make it prove a zero. This is the specific lesson of my own broken command in failure 5. When an assistant reports that a count came back empty, ask it to show the same command finding something — a case you both know is there. A pipeline that is silently erroring produces exactly the same clean zero as a healthy system, and enthusiasm is not a defence against that. Nor, evidently, is being the person who wrote the check.
Mine does not run on a Pi any more, and that is not a verdict on the Pi
I should be straight about this, because it would be easy to read the rest of this guide as a long complaint and conclude that the Pi was not up to the job.
It was. Jellyfin runs perfectly well on a Pi — including a Pi 3 or a Pi 4 with one to four gigabytes of memory, which is considerably less than the machine I measured. Nothing in the numbers above is marginal: 238MB of memory and two per cent of one core is not a system under strain, and the library scan was instant.
Mine moved for a completely different reason. The Pi in question is the busiest machine in the house — it runs more than eighty scheduled jobs and a pile of other services on top of them — while a larger box sitting next to it has spare processor and memory doing nothing. So the media server went where the capacity was. That is consolidation, not a rescue. It would still be running happily on the Pi if the Pi had less to do.
Which is worth saying plainly because the useful version of this guide is not "a Pi can't do this". It is: a Pi does this beautifully, as long as you never ask it to convert anything while somebody is watching. Get the files right and the hardware requirement is almost nothing.
Worth it?
For under an hour and 238 megabytes: easily, with one condition. If your files already play on your devices, this is the best value in the whole series — your own media, in your own house, on hardware you already own, at almost no running cost, and it will sit there working for months without attention.
If they do not already play, fix the files and not the server. Spend the ffprobe minute, find out how many of them merely need re-wrapping at seventy-six times realtime rather than re-encoding at a third of it, and convert the remainder overnight. No amount of configuration will make a Pi transcode on demand, and the settings page will let you believe otherwise for as long as you like.
And if you take one thing from the whole guide, take the reason this one is worth the hour: not the build, which is easy, but the fact that the most broken thing I found here was found by accident, on a different axis, by somebody looking at a graph of free disk space. Everything else reported that it was fine. Most of it genuinely was. Knowing which is which costs one query and it is the only part nobody else will do for you.